.png?width=150&height=63&name=TWRlogo-regmark_blueblack%20(1).png)
.png)


As an introvert, I love email. Emailing is far less stressful for me than making phone calls or talking in person. However, email creates its own levels of stress (I strive to maintain zero inbox). Over the past year, I've learned these Outlook tips and tricks to make email processing a more efficient process.
Use Keyboard Shortcuts
There is a very extensive list of keyboard shortcuts for use in Outlook. I must admit, I don't use keyboard shortcuts as often as I should. But these shortcuts that I do use in Outlook are very valuable.
- Ctrl + R: reply to an email
- Ctrl + F: forward an email
- Ctrl + 2: switch from mail to calendar
- Ctrl + 1: switch from calendar to mail
- Alt + Q: search outlook
- Alt + H: takes you to the "Home" tab on the menu bar
Although I have a hard time remembering to use shortcuts that involve three separate keys, I do use these two shortcuts.
- Ctrl + Shift + M: create a new email
- Ctrl + Shift + R: reply to all
Customize Your Ribbon
The ribbon at the top of Outlook provides quick access to a variety of commands, tools and features organized into groups. There may be times when the item you need is not shown on the ribbon. And there might be several there that you never use. The answer is to customize the ribbon for your needs. 
To customize the ribbon, simply right-mouse click anywhere on the ribbon and select "Customize the Ribbon". Alternately, click on "File" in the menu, click on "Options" (bottom of menu on left) and pick "Customize Ribbon".
In the chart on the right side of the pop-up window, you can expand each main tab of your Outlook ribbon view how items are grouped and to add or remove items from that tab. In addition, you can change the order that they appear on the ribbon for each tab.
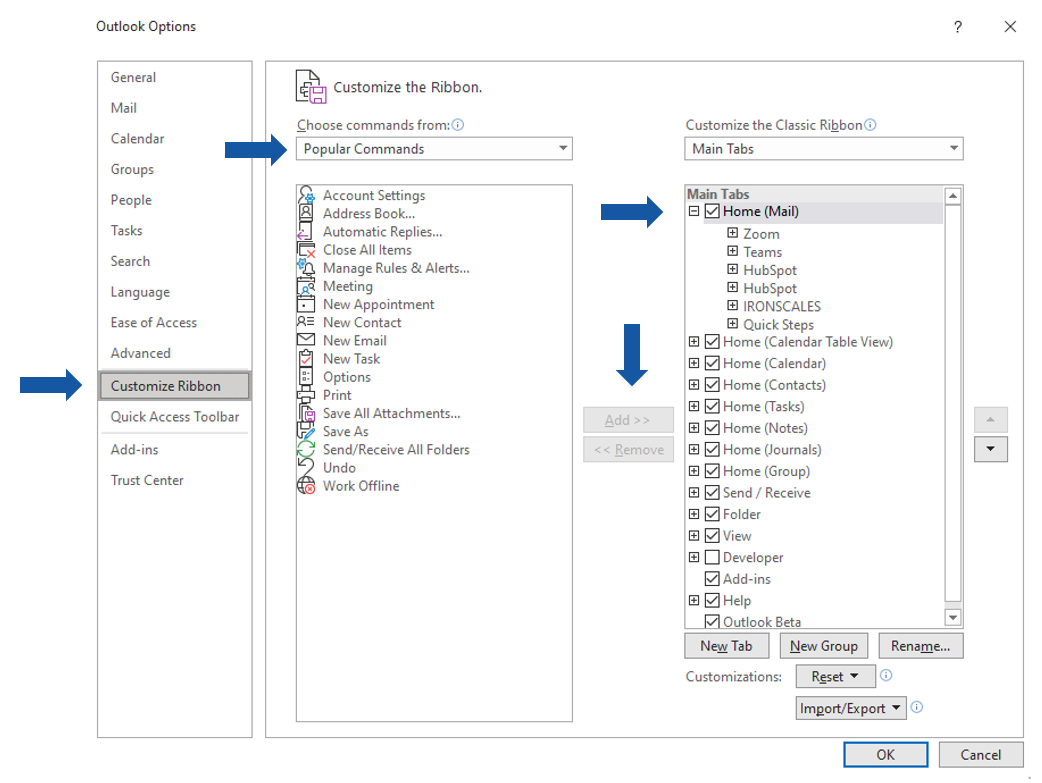
To add items to the ribbon, you can either select from "Popular Commands" to add those to your tabs/groups or you can browse the "All Commands" list that is extensive. You also can do like I've done and remove items from the ribbon to reduce clutter. Finally, you are able to change the order of each item simply by moving it up or down on the list on the right.
Use Add-ins
In the image of my ribbon above, you will see an item called "Get Add-ins". Add-ins are pieces of applications that run inside Outlook. Each add-in provides a little piece of an app where it makes sense to connect that app with Outlook. There is a large library of add-ins you can choose from, ranging from the ability to add silly GIFs to your emails or track your Fedex deliveries to connecting your Zoom account to your calendar or connecting your emails to your CRM solution.
Here are two examples of Add-ins from my ribbon above.
- "HubSpot Sales", located directly next to the "Get Add-ins" icon, connects our CRM with Outlook.
- "Report Phishing" is a tool we use to report phishing emails to our IT admin.
You can search the Outlook add-ins library for the apps that you use. To do so, click the "Get Add-ins" button on your ribbon. You can either search for specific apps or browse through the full library.
If you do not have the "Get Add-ins" item on your ribbon, you will need to go to "Customize the Ribbon" and create a custom group under the tab where you want it to appear (note that you can change the label for that group). Select the group you just created. Then, in the box where you choose commands, open the list of "All Commands". Scroll down to "Get Add-ins" and then click "Add" to put it on your ribbon.
Create and Use Quick Steps
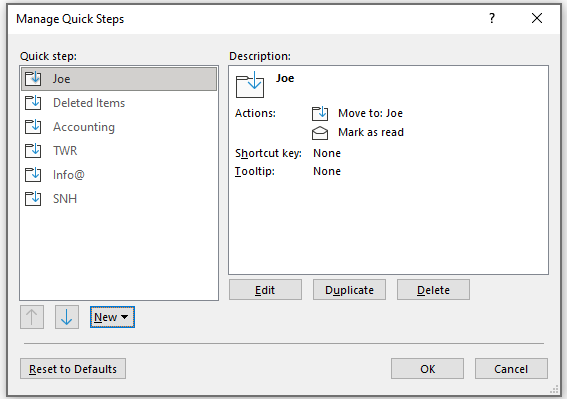
Quick Steps allow you to combine common and/or often repeated steps into one clickable button. One of the advantages to minimizing the number of commands, tools or features on your ribbon is that you can use that real estate for Quick Steps. On the image above of my Outlook ribbon, on the right end you will see the Quick Steps I have created to mark emails as read and move them to specific folders. You can also use Quick Steps to flag and move or categorize and move emails.
If you do not see Quick Steps on your ribbon, you can add it by customizing your ribbon.
To manage Quick Steps, click on the arrow on the bottom right corner of the tab. In the pop up box, you can create new steps, delete ones that aren't helpful for you and move the steps up and down to change the order they appear on the tab.
Happy Emailing!
Although you may protest that you don't have the time to learn and start using these tips, I would share Joe Woodard's advice. Sometimes you need to slow down to speed up. Happy emailing!


Do you have questions about this article? Email us and let us know > info@woodard.com
Comments: