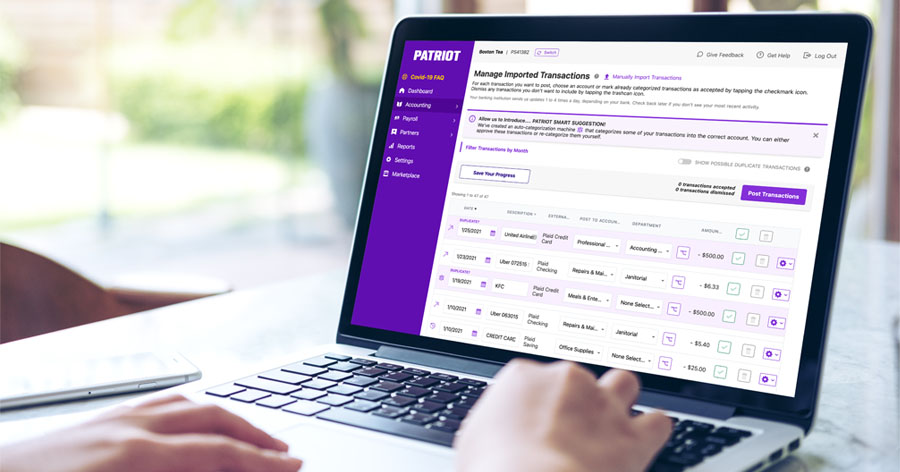
Time is money. So when it comes to importing bank transactions into accounting software, you want a smooth process—for both you and your clients.
Patriot’s Premium and Accounting Basic Software options streamline the process of importing bank transactions. But, don’t just take our word for it. Here’s a quick lesson on how to do bank imports in Patriot Software so you can see for yourself.
How to do bank imports in Patriot Software
Your bank transactions are key to managing your accounting books. And if you want to save time, bulk importing is the way to go.
So, all those in favor of bank imports, say aye. And read on...
Step 1: Connect your bank account
When you set up automatic bank imports in your accounting software, you don’t have to worry about manually importing spreadsheets.
Instead, the software automatically pulls your bank transactions into your account either the day of the activity or the day after. Transactions are then ready to go into your general ledger.
If you want to automatically import bank accounts, start by connecting your bank and accounting accounts. Here’s how to do that in your Patriot account:
- Go to Settings > Accounting Settings > General Settings > Connect Bank Accounts
- Click “Connect New Bank”
- Select your bank
- Enter your login credentials
- Select the accounts you want to import
- Choose the Patriot Software Account from your Chart of Accounts you want associated
- Choose a date to begin importing transactions
Expanded feature alert! In 2020, Patriot increased the time frame for bank imports to two years (originally seven days). That means Accounting customers can choose a date to begin importing transactions that’s up to two years in the past (if your bank institution allows it).
Accounting Basic customers can connect up to four financial institutions to their account, while Accounting Premium customers can connect up to 10. There is no limit on the number of accounts within those institutions you can connect.
After connecting your bank account, here’s how you get to the page that has your pending transactions. You have two routes:
- You’ll see a notification alert at the top of your Accounting Home Page. Click the “View Transactions” link
- Go to the left navigation menu. Then navigate to Accounting Financial Tasks > Reconcile Pending Transactions
Don’t want to connect your bank account?If you’re looking for an alternative to automatic bank imports, there’s also manual bank importing. You can upload .xls, .xlsx, and .csv file types. Learn more about manually importing bank transactions is easy and requires just simple mapping spreadsheet to Patriot. And even if you opt for automatic bank imports, there may be times when you need to do a little manual legwork, which we’ll get to later.
Step 2: Categorize your bank transactions
Whether you’re manually or automatically importing bank transactions, your work isn’t done when they’re pulled into your software account. Next, you need to assign them to accounts and departments (if applicable).
Take a look at how Patriot helps make this necessary process easier, saving you all the clicks you would normally have to do for each transaction:
- Suggestions based on what other users have selected (artificial intelligence)
- Suggestions based on your history
- Ability to set up rules
Here’s a screenshot of the above three time-saving automations in action (icons at the far left—we’ll get to what each is below):
.png?width=1600&name=patriot-transactions%20(1).png)
Patriot’s software uses artificial intelligence (AI) in the form of machine learning. Known as “Patriot Smart Suggestion,” Patriot’s machine learning provides automatic expense account suggestions based on what other users have selected for similar types of transactions. You can either accept or dismiss the suggestion. You’ll know the software has automatically categorized a transaction using Smart Suggestion when you see an atom-like icon at the far left of your import page.
The software can also make suggestions based on your history to determine the correct account. You’ll see a clock icon if the software has automatically categorized a transaction using your historical data. Again, accept or dismiss the suggestion.
And last but not least, you can set up rules (e.g., all transactions containing “Paper”) so the software automatically assigns imported transactions to the appropriate accounts (e.g., Checking account) and departments. You’ll see a magic wand icon at the beginning of the row (because saving time is magical).
You can set up automatic bank import rules right in Settings or on the Import Transactions page. All it takes is a few simple steps:
- 1. To create a rule in Settings:
-
-
- a. Go to Settings > Accounting Settings > General Settings > Transaction Rules
-
-
- b. Click “Add a Rule”
- 2. To assign a new rule or existing rule to a specific transaction on the Import Transactions page:
- a. Go to Accounting > Financial Tasks > Manage Imported Transactions
- b. Choose a transaction you want to set a rule for
- c. Click the gear icon at the end of the row
- d. Choose “Create a new rule for this transaction” or “Add this transaction to an existing rule”
OK, so once you’re on one of the above pages, it’s time to create your rule. When creating your rule, you must:
- Detail the text or alphanumeric characters to include
- Exclude any text (optional)
- Name your rule
- Select the account where these transactions should go
- Assign a department where these transactions should go (optional)
If more than one rule applies to a transaction, the software will apply the most recent rule. If you need to change the account, department, or both, you can do so.
Already made a journal entry for a transaction? Simply dismiss it (yes, it’s that easy).
Until you accept or dismiss the imported transactions, they’ll appear as “Pending Importing Transactions.”
What if I need to allocate a transaction to more than one account?
Sometimes, there’s more to a transaction than meets the eye. One single bank transaction (e.g., buying $1,000 worth of office supplies, food, and equipment from one place) might need to be allocated to several accounts or departments. If that’s the case, you need to split the transaction after importing it.
Patriot’s split transaction feature lets you allocate the amount, account, and department when importing a bank transaction. Simply click the “Split Transaction” icon, break down how much should go where, and click “Apply Changes.”
![]()
Need to make changes to your import connection?
This step is only for those who decide to take advantage of the automatic bank imports option. You can make the following changes to your import connection at any time:
Edit bank accounts
If you need to change up the bank account connection in any way, you can edit bank accounts quickly and efficiently.
Want to change the bank accounts that are importing into your Patriot account?
- Go to Settings > Accounting Settings > General Settings > Connect Bank Accounts > Manage Connected Accounts
Want to change the Patriot Software account for each connected bank account?
- Go to Settings > Accounting Settings > General Settings > Connect Bank Accounts > Edit
Pause the import
Need to pause one of your transaction imports from one of your bank accounts? No problem.
Here’s what to do:
- Go to Settings > Accounting Settings > General Settings > Connect Bank Accounts
- Click “Pause” for each account you need to pause imports for
Time to unpause? Simply:
- Go to Settings > Accounting Settings > General Settings > Connect Bank Accounts
- Click “Resume” for each account you want to resume imports for
If you get to a point where you want to permanently stop the import connection, you can...
Disconnect a bank account
To disconnect a bank account connection, use the following three steps:
1. Go to Settings > Accounting Settings > General Settings > Connect Bank Accounts > Manage Connected Accounts2. Click “Disconnect”
3. Click “Yes” to the “Are you sure?” question
Keep in mind that if there is no activity after 45 days for a particular bank account, it will automatically disconnect.
Step 0: Signing up
If you’re interested in taking advantage of bank imports and other key accounting features, you can sign up for Patriot’s Accounting Premium or Accounting Basic Software.
Accountants can join Patriot’s Partner Program to receive special pricing for their clients and free accounting for the firm (with 6 or more client accounts).
And here's the best part: Each new accounting account gets 30 days free!
.png?width=150&height=63&name=TWRlogo-regmark_blueblack%20(1).png)
.png)


Do you have questions about this article? Email us and let us know > info@woodard.com
Comments: